Case
Microsoft released the SSIS Feature Pack for Microsoft Azure (
2012,
2014), but how do the Azure Blob Source and Destination components work?
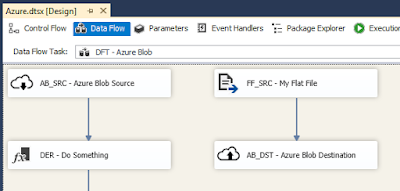 |
| Azure Blob Source and Destination |
Solution
1) Storage Account
First make sure you have an Azure account that has an storage account in it. Besides the name the location is also important. Especially for the Azure HDInsight Create Cluster Task. Mine is called SSISJoost.
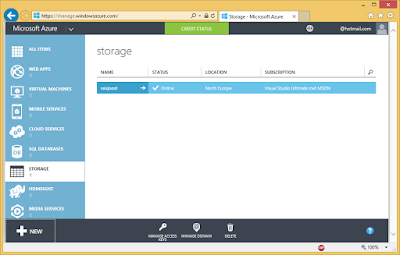 |
| Storage Account |
2) Access Keys
Click on the Manage Access Keys icon to get the primary access key. We need this for the Azure Storage Connection Manager.
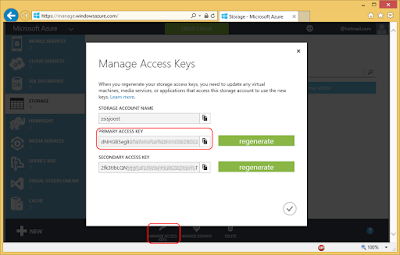 |
| Storage Account Access Keys |
3) Connection Manager for Azure Storage
If you haven't already installed the SSIS Feature Pack for Microsoft Azure then now it's time to do that. Create a new Connection Manager for Azure Storage by right clicking the Connection Managers Pane. Then choose New Connection... and then AzureStorage. Fill in the Storage account name from step 1 and the Access key from step 2. Test the connection and click OK to save the new Connection Manager.
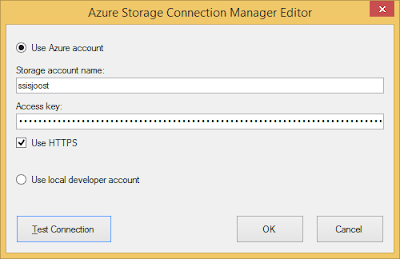 |
| SSIS Connection Manager for Azure Storage |
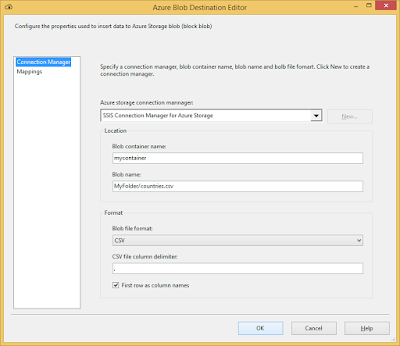
4) Azure Blob Destination
Add the Azure Blob Destination to the surface of your data flow and connect it to the preceding transformations. The properties are very limited. You don't have to specify things like datatypes and qualifiers. If you want to specify those you first use a Flat File Destination to store the file locally and then use the Azure Blob Upload Task to upload the file to Azure.
Azure storage connection manager: use the connection manager from step 3 or create a new one.
Blob container name: specify the containername of Azure where you want to store the file. A new container will be created if it doesn't exist.
Blob name: The name of the file optionally with a 'subfolder'. In the Azure Blob Upload Task these are two separate fields.
Blob file Format: specify the format of the file - CSV or AVRO.
CSV file column delimiter: if you chose CSV you can specify the column delimiter.
First row as column names: if you chose CSV you can specify whether you need a header row.
 |
| Azure Blob Destination |
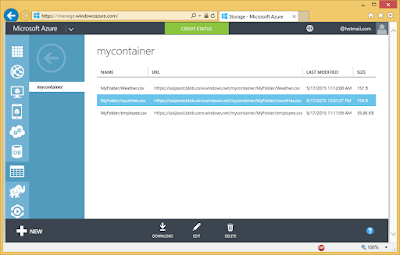
5) Result blob destination
Run the data flow and go to Azure to see the result. In mycontainer you should see the newly added file.
 |
| Result of Azure Blob Destination |
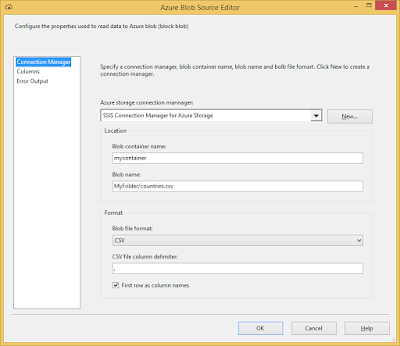
6) Azure Blob Source
Add the Azure Blob Source to the surface of your data flow and edit it. Again the properties are very limited. You can't specify things like datatypes and qualifiers just like with an Excel Source. If you want to specify datatypes, qualifiers, etc. you first use the Azure Blob Download Task to download the file and then use a regular Flat File Source component.
Azure storage connection manager: use the connection manager from step 3 or create a new one.
Blob container name: specify the containername of Azure where the file is stored.
Blob name: The name of the file optionally with a 'subfolder'. In the Azure Blob Download Task these are two separate fields.
Blob file Format: specify the format of the file - CSV or AVRO.
CSV file column delimiter: if you chose CSV you can specify the column delimiter.
First row as column names: if you chose CSV you can specify whether there is a header row.
 |
| Azure Blob Source |
Tip: You can also use the Foreach
Azure Blob Enumerator in combination with the Azure Blob Source


