Since last year we can run the good old SSIS packages in the Azure cloud. Not on a self created and self maintained virtual machine, but with the Integration Runtime service in Azure Data Factory.
However Microsoft also introduced Azure Databricks and called in ETL 2.0. So I'm not sure how much effort Microsoft will put in any future release of SSIS. But Azure Databricks is not a visual tool and not everybody is into coding. Is there an alternative?
 |
| Visual ETL in Azure |
Solution
You can probably keep on using SSIS for an other decade, but if indeed the development of SSIS stagnates and the rest of the data platform isn't, then it is good to learn a couple of new tricks. Within the Microsoft Data Platform we a couple of alternatives for SSIS:
- Azure Databricks
As mentioned above this requires learning some new coding skills since this isn't a visual development tool. I will post an introduction in a later blog post. - Azure Data Factory with Pipelines and T-SQL
You could use the Copy Data activity in combination with the Stored Procedure activity and build all transformations in T-SQL. If you are a diehard SSIS developer then this is probably not your cup of thee. - Power BI Dataflows
The Power BI team just introduced self service ETL within Power BI. We just added a new post to explain this new option which will make some people very exciting. - Azure Data Factory Dataflows
This is a new preview feature in Azure Data Factory to visually create ETL flows. Below I will show you the steps to create you own first simple Data Flow.
1) Request preview access
If you are reading this during the preview periode (early 2019), then first request access via this form. With your Azure subscription Guid that you need to provide, Microsoft will turn this new feature on for you that specific subscription.
 |
| Check 'Version' for the preview version |
2) Create Databricks Service
Yes you are reading this correctly. Under the hood Data Factory is using Databricks to execute the Data flows, but don't worry you don't have to write code.
Create a Databricks Service and choose the right region. This should be the same as your storage region to prevent high data movement costs. As Pricing Tier you can use Standard for this introduction. Creating the service it self doesn't cost anything.
 |
| Create Databricks Service |
3) Create Databricks cluster
Now go to the newly created service and click on the Launch Workspace button under the big Databricks logo in the center.
 |
| Launch Workspace |
A new tab will open (just like with data factory) and in this workspace we need to create a cluster. A cluster is a collection of virtual machines that will do the ETL work for you. This is also where you start paying! Click on Clusters in the left menu and then on Create Cluster (or click on New Cluster under Common Tasks in the center).
 |
| Create new Databricks cluster |
For the Cluster Mode use the default option: Standard. For the Runtime Version choose: Runtime: 5.0 (Scale 2.11, Spark 2.4.0). Pyhthon version. The other options to change are the number of minutes of inactivity before terminating the machine. For this example 60 minutes should be enough to create and execute your new data flow. And most important for you wallet is the Worker Type and the numbers of workers. For this example one of the cheapest (Standard_DS3_v2) should be more than enough.
 |
| Create cluster manually |
Note: In a future post I will show you how to create a cluster automatically. For now we will create one manually, but terminate it automatically when you are ready (= not doing anything with the cluster).
 |
| Creating a cluster takes a few minutes |
4) Create Data Factory V2 with data flow (preview)
Create a new Data Factory and choose 'V2 with data flow (preview)' as the version. At the moment of writing this new feature is only available in 4 regions, but more regions will be added on its way from preview to general availability. So watch out with moving lots of data between regions. Also notice the option to add a couple of examples which will help you to master the Data Flows.
 |
| Only available in 4 regions at the moment |
5) Add new Data Flow
Now go to the newly created Data Factory and click on Author & Monitor to go to the Data Factory portal.
 |
| Azure Data Factory, open portal |
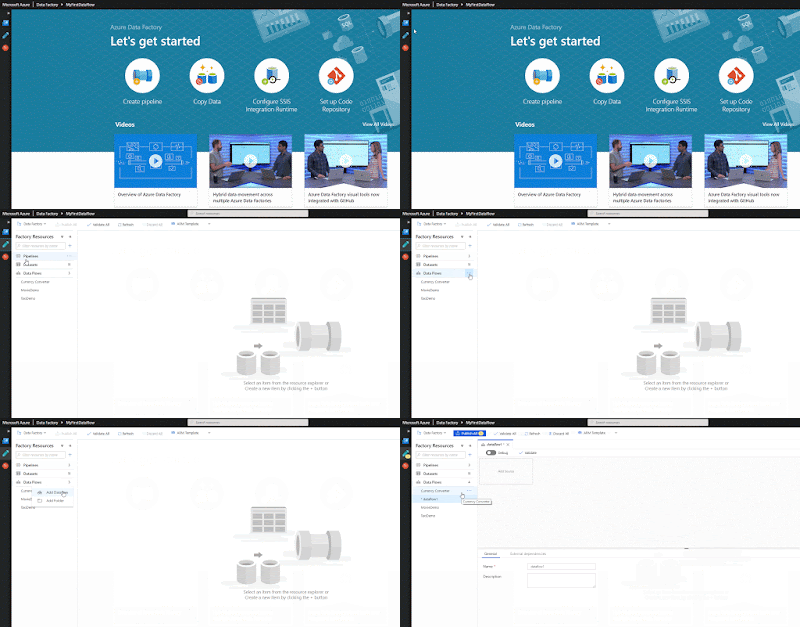
In the portal go to the Author page (pencil icon in the left menu) and then click on the three dots behind Data Flows and choose Add Dataflow. A new empty Dataflow will be created and we can start adding a source.
 |
| Add Dataflow |
6) Add source
For this example I will use an existing file that is located in an Azure Blob Storage Container. Go to the new dataflow and click on the source to specify the file from the Blob Storage Container. First give the source a suitable name. In the second field you can find all existing datasets, but if you click on the +New button behind it, you can create a new dataset. Now you first need to give the dataset a name and then you can specify the connection to the Azure Blob Storage Container.
 |
| Adding source part 1 |
When creating a new Blob Storage Container dataset it only creates a link to the storage account itself. You still need to specify the container, filename and properties like delimiter and column names. To do that hit the Edit button and go to the Connections tab. Here you can specify all properties like location and file format. Next go to the Schema tab to specify the columns. You can do that manually or by clicking on the Import Schema button that will read the column names from the file. After this you can specify the datatypes for each column. Now the source dataset is ready, but we still have to map this to the source in the dataflow.
 |
| Adding source part 2 |
Go back to the new dataflow and go to the Define Schema tab. Use the Import from dataset button to import all columns from the dataset. The datatype is not copied from the dataset. I'm not sure whether this is deliberately or that it is a bug. Now the source is ready and we can start adding transformations.
 |
| Adding source part 3 |
7) Add transformation
The number of different transformations is not yet as rich as those of the SSIS Data Flow Task, but the most important transformations are available and there are also some handy new ones like SurrogateKey and Window (for aggregation on time windows) which are not available in SSIS.
On the other hand the expression language in the Derived Column is much more comprehensive with for example functions for hashing and a lot of string functions which are not available in SSIS.
For this example I will add a Derived column to upper the location column. Click on the little + behind the source to add a new transformation. Click on Derived Column and edit an existing column. When editing the expression a new window will appear. The upper method can be found under String and the column name can be found under Input. If you know SSIS then this should be very familiar.
 |
| Adding a Derived Column transformation |
8) Add destination
For this example I will use an existing table in an Azure SQL Database as destination. Click on the little + behind the Derived Column to add a new item to the dataflow. Scroll down to the bottom and click on Sink. Now you can add a new destination dataset (sink dataset) for this output. First give the output stream a name and then click on the + New button to add a dataset. Choose Azure SQL Server and give the dataset a name in the next step. After that we need to create a new connection to the database server. See the animated gifs for the details.
 |
| Destination - Add sink dataset and connection |
When creating a new sink dataset and its connection, it only creates a link to the SQL Server database. You still need to specify the table name and columns. To do that hit the Edit button on the dataflow destination and go to the Connections tab. Here you can specify which table you want to use. Next go to the Schema tab to specify the columns. You can do that by clicking on the Import Schema button that will read the columns from the database table. Now the sink dataset is ready, but you still need to create a column mapping.
 |
| Destination - Choose table and columns |
Go back to the dataflow, click on the destination and then go to the Mapping tab. If the column names in your dataflow are the same then you can use Auto Mapping. Otherwise turn of the auto mapping and do it manually.
 |
| Destination - Mapping |
9) Debug
You probably already clicked on the Data Preview tab of the source, derived column or destination and saw that you first have to turn on debug mode.
 |
| Please turn on the debug mode and wait until cluster is ready to preview data |
To do this we first need to get a new token from Azure Databricks to connect from Data Factory. Go to the Databricks portal and click in the person icon in the top right. Then choose User Settings and then hit the Generate New Token button. Copy it and keep it save in for example KeePass because you wont be able to retrieve it again.
 |
| Generate New Token in Azure Databricks |
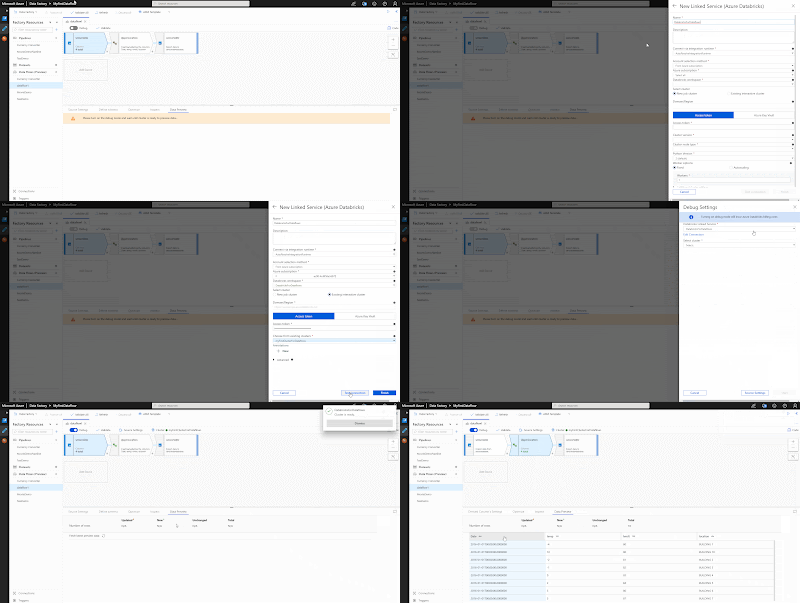
Now go back to your dataflow and switch on the debug mode in the top left of the dataflow. A new form appears on the right side where you can create a new linked service to the Databricks service. This is where you need the token from the previous step. For details see animated gif. After that select the cluster that you created and hit the start button. Now it will connect to the cluster and you will be able to see the contents of the Data Preview tabs.
 |
| Debugging dataflow (not the actual speed) |
10) Create pipeline
The dataflow is ready and we can now add it to a data factory pipeline with the new dataflow preview activity. You need to provide the name of the dataflow you want to execute, but also the link to the Azure Databricks Service. You can reuse the linked service from the previous step.
 |
| Adding dataflow to the pipeline (not the actual speed) |
 |
| And the result viewed with SSMS |
Summary
Microsoft created a new Visual ETL tool with lots of promising features that could become a great successor for SSIS. However it does not yet have the Visual Studio feeling like with SSIS. So that will take some time to get used to. Debugging is an other thing. It works, but takes me way to much waiting time at the moment. It will probably be faster with a more expensive cluster, but not sure it will match the SSDT experience. Besides these two notes, I can't wait to get some actual working experience with it.